Moving your iTunes media library without losing its metadata
It’s always painfully annoying when your hard drive dies on you (especially if you haven’t made any backup). This just happened to poor me. :'( Fortunately enough, I have got into the habit of making weekly backups of everything I have. In other words, I didn’t lose any data at all. This should be a lesson to all of you who doesn’t back up your important files!
Anyway, I therefore needed to move my iTunes library to a new drive. It turned out that there is no easy way of doing so, especially if you haven’t selected the option in iTunes to “keep iTunes media folder organized”. I didn’t want to lose all the metadata (ratings, plays etc.), so I tried to find an alternative way. I eventually found a method after digging around in forums (pretty hard to find) which worked out alright in the end, involving modifying all the paths in the iTunes XML database file.
- First of all, just in case something goes wrong, backup your iTunes library data (make sure iTunes is closed before doing so). These files can be found in <user-folder>\My Music\iTunes+ for Windows, or in /Users/<username>/Music/iTunes for Mac.
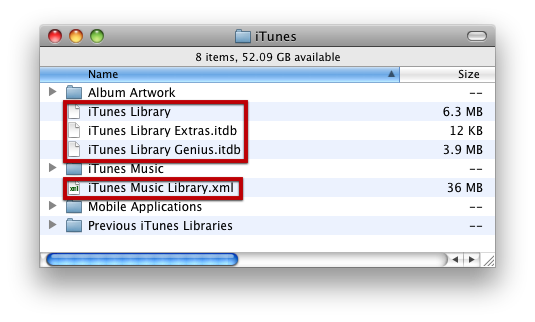
- Move your media library to the new location if you haven’t already done so.
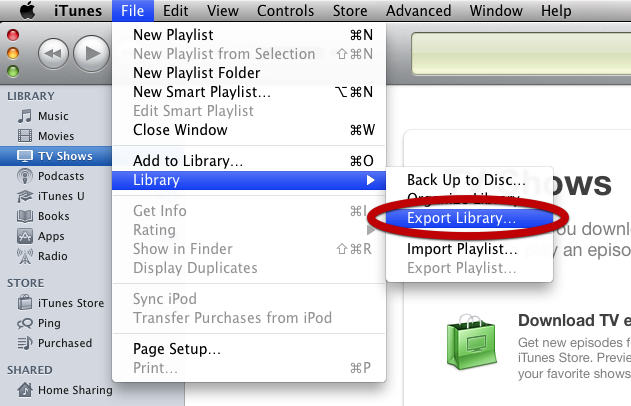
- Start iTunes and select “File -> Library -> Export Library” in order to export your library XML database file. Save it wherever you want, e.g. on your Desktop. Close iTunes when you’re done.
- Open Library.xml in a text editor in which you have a “find and replace” function. Notepad in Windows is not good enough for this purpose, I would instead recommend Notepad++. On Mac OS X, TextEdit would work fine for this purpose, but only if it is set to plain text mode (not RTF mode). The point is that you need a plain text editor.
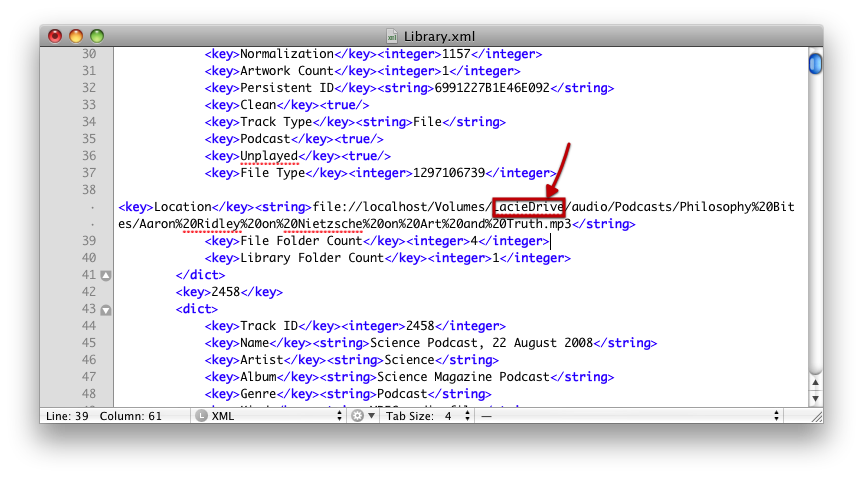
- If the only thing that changed when you moved your files is the drive name (Mac) or the drive letter (Windows), then do a find and replace and change the old drive name to the new name. For example, “wdDrive” -> “LacieDrive”.
- This will take a few minutes depending on the size of your media library. Make sure to save when finished.
- Now, open up iTunes and delete all the files, which you moved to another location, from iTunes. You can do this by selecting them and then right-clicking on them and choosing delete. If prompted, make sure to select the option for keeping them.
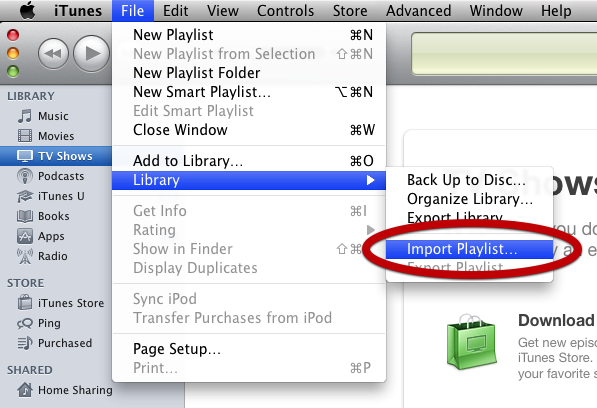
- After deletion, import the previously modified Library.xml by selecting “File -> Library -> Import Playlist”. Depending on the size this can take a long time. In my case it took about 15 min.
- Done. Check so that everything turned out fine by playing some of the songs.
It seems like Apple should provide an easier way to do such an essential task as updating your file paths after moving your media library. Hard drives die all the time, right!
